

Enhance
Upscale architectural and interior renders to 4K and beyond in Fenestra Enhance — add sharp detail and texture for client-ready presentation and listings.
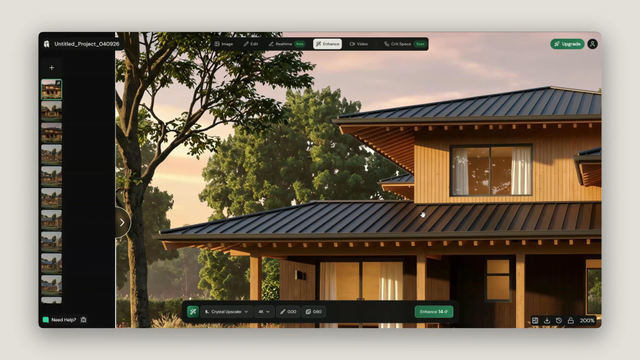
Select your image
Create a new session and upload an image, browse assets, or pick a generation you've already created. For this example we're starting with a rendering originally generated at 1376x768 using Flux 2 Pro, a great alternative to Nano Banana 2 for more cinematic results.

Choose your AI model
Enhance has no prompt bar. Select your model and resolution and click Enhance.
We recommend Crystal Upscaler as your default, it adds missing detail and gives you the clearest path to high quality 8K images.
- Crystal Upscaler → best overall quality, adds detail naturally. Recommended for most images.
- Clarity → adds a significant amount of detail. Use this if your image is lacking detail and you want to push it further. Not a typical sharpener, avoid if your key design elements are already clearly defined.
- Real-ESRGAN → the most affordable model, supports up to 8K with optional face fix. Good for quick upscaling tasks where additional detail is not essential. Lowest quality of the three.

Select your resolution and generate
Choose your output resolution and click Enhance. For this example we used Crystal Upscaler at 4K with default settings. Feel free to adjust creativity and resemblance to your preference.

Compare
Once your enhanced image is ready, use Compare to see your original on the left and the enhanced output on the right.


Bear in mind that 8K images can be upwards of 50 MB, allow a moment for the image to load before comparing.
Next steps
Ready to bring your enhanced renders to life? Try Video to animate any still image with cinematic camera movements and scene transitions.